Published: October 09, 2017
Everyone loves popcorn, right? Well, at least the delicious, buttery kind you get at movie theaters. Popcorn ceilings, on the other hand, aren’t as widely loved. While widely popular in the 60s and 70s, most homeowners now are eager to get rid of that odd textured look and upgrade to smoother, more modern ceilings. While there are many services out there willing to charge a pretty penny to remove them for you, there are many who prefer to take on the project themselves. For those DIYers, read UNITS guide to remove the popcorn ceilings in your house:
Safety First
The first step before beginning the de-popcorning of your home’s ceilings is testing for asbestos. If your home was built before the 1980s, and most homes with popcorn ceilings were, it’s crucial for your own safety that you test the plaster or drywall on your ceiling for asbestos before getting to work. Follow the EPA’s guide to safe asbestos testing and removal here.
Supplies You’ll Need
Safety Glasses
Dust Mask
Plastic Sheeting
Painters Tape
6” Putty Knife
Garden Pump Sprayer
Step Ladder
Drywall Joint Compound
Sand Paper
Prepping the Room
Once you have the all clear, it’s time to start prepping the rooms you’ll be working in. Start by removing all the furniture from the room. If removing popcorn ceilings from your entire house, consider renting one of our portable storage containers for the remodel period so your furniture stays safe, clean and out of the way. Turn off the air conditioning system and electricity in the room and remove light fixtures and ceiling vents. Cover the holes from removed vents and light fixtures with plastic and seal with painters tape. Cover electrical outlets and light switches with plastic and painters tape, as well. Lastly, cover the floors and walls with plastic sheeting and seal with more painters tape. Make sure the plastic covering the floor extends up a foot onto the walls and that the plastic covering the walls overlaps it. It might seem like overkill to do all of this, but you’ll be thankful when it comes time to clean up the mess afterward.
Removal Process
Dawn your stylish safety glasses, dust mask and an old pair of clothes (this is going to be a messy process). Using a garden pump sprayer three quarters filled with warm tap water, spray an area approximately 5 x 5 ft with water. Let that section of ceiling soak for about 15-20 minutes. Now, it’s time to start scrapping. Using your putty scraper, begin gently scraping down the soaked section of ceiling. If you aren’t gentle while removing the popcorn texture, you may gouge the drywall and later have to repair it. If a section is proving to be particularly difficult, simply re-spray with water, wait a few minutes and try again. Repeat this process until all the popcorn texture is removed.
Finishing Touches
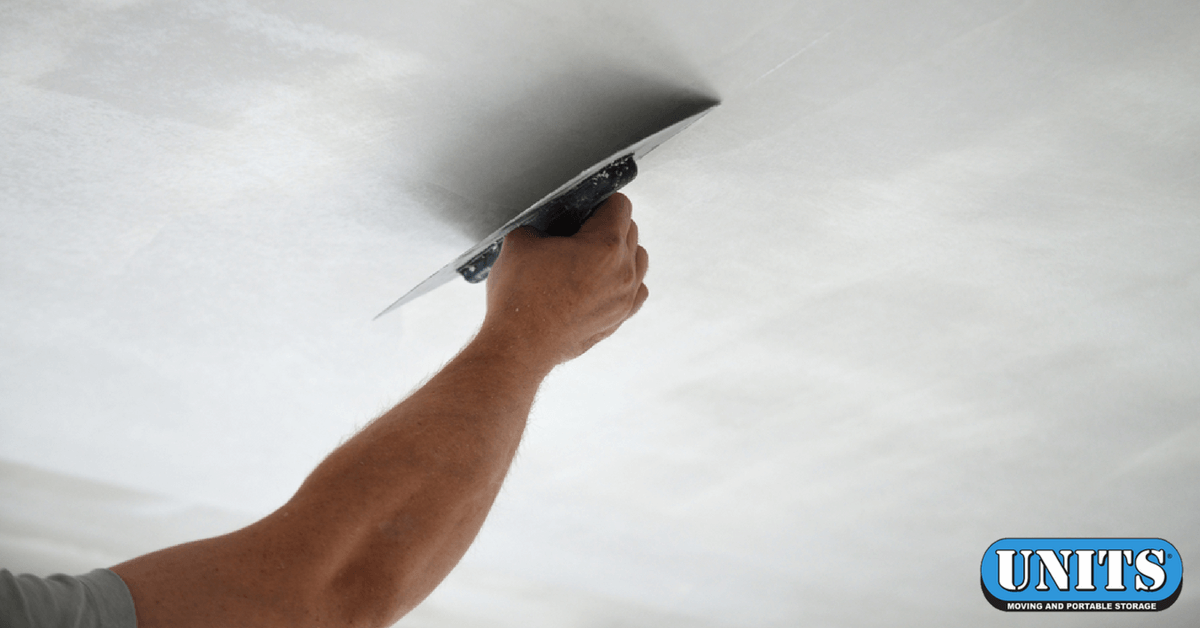
Once you’ve scraped away all the texture from your ceiling, you’ll notice that it doesn’t like paint-ready yet. No matter how gently or precisely you are when removing the popcorn texture, there will likely still be uneven areas and small dings. Use drywall joint compound to repair gouges in the ceiling. Let dry and then sand away any rough spots or uneven areas. Finally, prime and paint with latex ceiling paint.
Once you’re done painting, clean up easily by removing the plastic sheeting and reinstalling light fixtures, vents and electrical covers. Move your furniture back in, sit back, relax and enjoy your now popcorn-free ceilings!